Tuesday, March 31, 2015

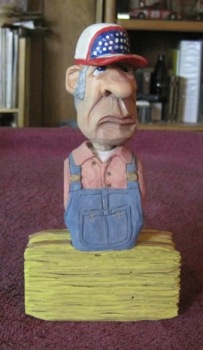
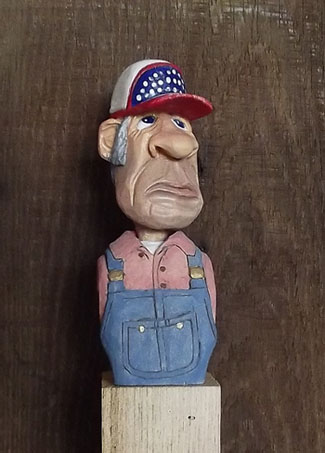
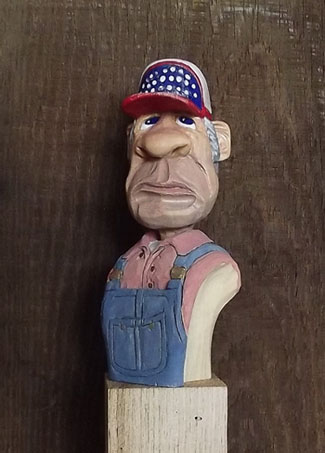
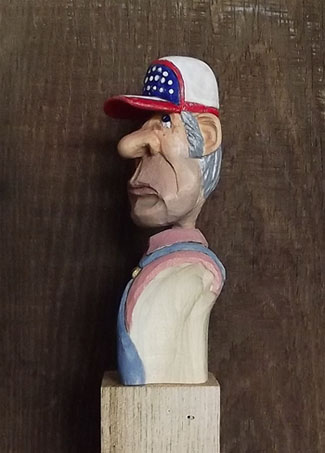
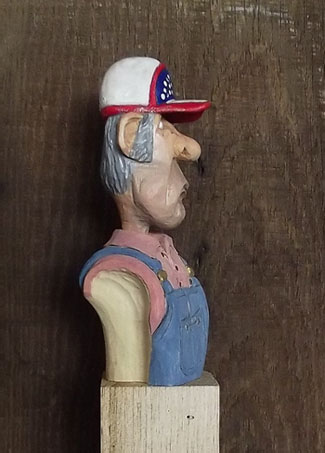
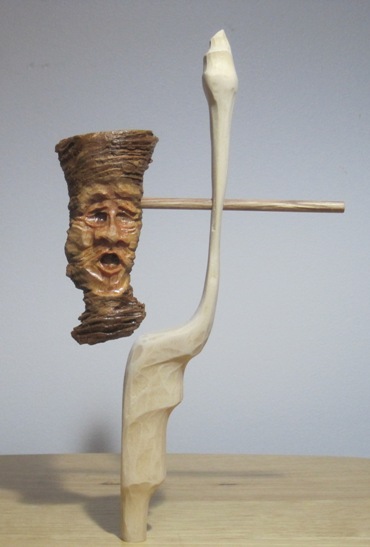
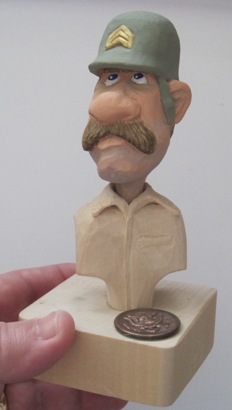
So I know that many have seen the farmer carving, and I want to thank all who have given such great feedback on this one. I will be looking into the idea of entering him in a carving competition later this year. Now the question is, when it comes to a bust carving how much is too much? Can you add too much to the background, does it take away from the carving bust itself?


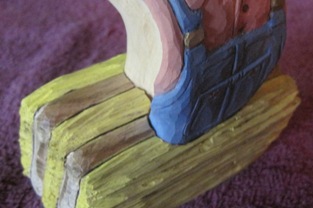
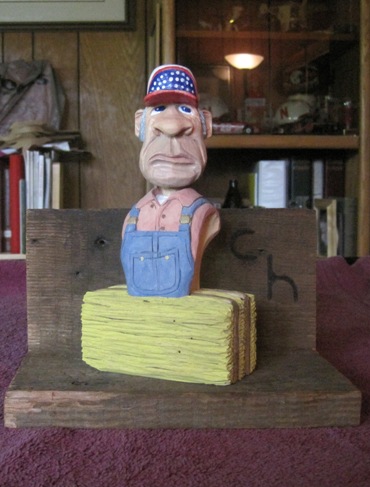
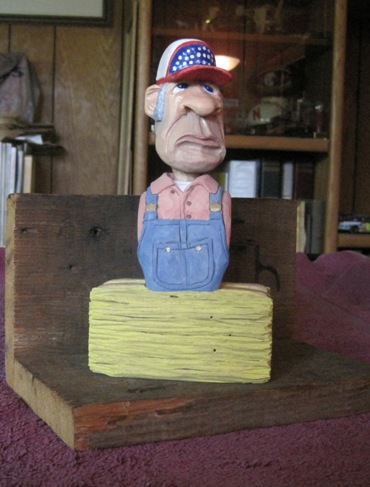
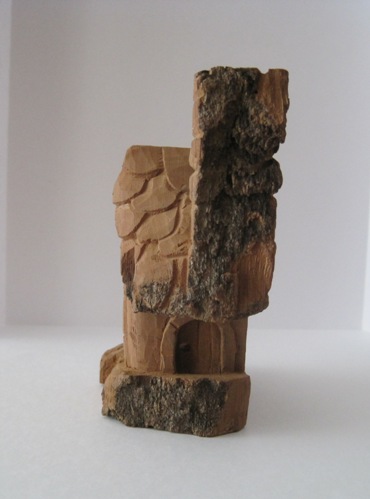
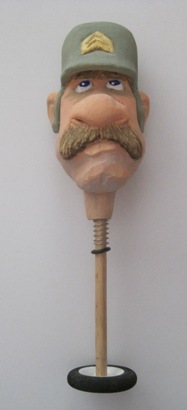
So as many may have read the dark wood base is made from wood from my grampa's barn and the branding markings on the wood are a replica of his actual brand for his cattle. So this got me thinking of grampa's barn. I remember being in that old barn as a kid up in the loft, atop bales of hay. As I thought back I began to remember all the things found in the barn and as I built my list once again I wondered, can I add to much when it comes to a bust carving? Well I will be looking into this idea in the next few days and weeks as I continue to carve and add pieces to this carving. After all whether I enter this or not it will end up on display in my home. I may have two set-ups, the one entered and the one on display at home.  I will a I have posted a few pictures to show the various ways I could set-up this bust carving, take a look and see what you think.

 
as always happy trails
and
Carpe diem 4 carving 

Friday, March 27, 2015

American farmer update "the Base"

Lately I have begun to look at have a separate base for my carvings just to mix it up some. As many may know, most of my carving bust the base is carved into the body of the carving. And as many may have noticed the American farmer doesn't have the base carved in so a base would need to be added. At first I was going to do a hay bale but then wasn't sure I could do one that looked right and then I took my dog to our vet. I have taken carvings in to show him in the past as he has an artistic side, so we have shared with each other our latest efforts in that regard. After his was done with our cat' we began talking music and carvings. I told him I would be putting this guy on a wood base and low and behold as if to affirm my original concept he said "what about a hay bale".

So a hay bale it would be, hopefully. Since I had just received a new shipment, I took a piece of butternut cut it into three pieces and began carving my first hay bale. I was hoping the grain of the butternut might add to the bale. I was not sure at first how many I would carve and how I would set them up so I had three pieces ready. After carving the main detail in I started pondering how I would set the farmer on the hay bale. Due to the multiple cuts to try and give the look of hay I realized he wouldn't have a large area to be secured too. So I decided I would have him inserted into the bale slightly. This would steady him up and to help secure him to the bale. So I took a sheet of paper, traced the outline of the bottom of the carving and transferred the shape to the hale bale. So like a puzzle piece he fit into the bale after a few adjustments.


Now though I was happy with this I thought it was missing something, I kept thinking back to some previous pictures I took of the farmer with a piece of wood behind it. I really liked the way the wood looked with the carving and on a sentimental note that wood came from my grampa's farm, actual pieces from his barn. He was an American farmer and I had great memories of the times spent on his farm. So to bring this together I took a smaller piece of the wood that I have to experiment with. I even used old school techniques in putting the two pieces together. Instead of nails or screws I drilled three holes and used wood dowels to secure the two pieces and all of a sudden I had a base. The finishing touches were more sentimental in nature. I have a piece of wood from my grampa's farm that had his brand for his cattle burned into the wood. So I replicated his brand into the board behind the farmer. I think it gave the old wood that little extra authenticity that makes this one special to me. Sometimes we carve for others, sometimes we carve for future sales and sometimes a carving is simply for ourselves beyond the joy of carving. That is the case with this one. I have a few little extras that I will try to incorporate in the next few days, but if I do nothing else to it, I am happy with this one, very much so.

as always happy trails
and
Carpe diem 4 carving  

Tuesday, March 24, 2015

American farmer update

So I have painted the chest portion of the carving, now he awaits a base and to have the sealant coat applied. I have experimented with this one in the way that I connect the head to the body. In the past I simply put the head in the body and let it to a certain extent position itself based on how the neck fit in the opening. The only thing here was I didn't always feel I could have the head leaning in the position I liked, seemed like the heads were always a bit stiff. Well to combat this I bought some copper wire from the hardware store, drilled a small hole in the neck and in the neck cavity and used a piece of the copper wire to not only firm up the head in the bust but it also allowed me to actually position the head more to my liking. In the future I will carve a longer neck. I will also have less taper in the neck area and then with the copper wire I will decide the best positioning for the head. I may need to modify the length of the neck to do so but it is always easier to take away than it is to add on.

In the painting process I wanted the shirt to look like it had some age but not necessarily worn out. I wanted to try and get a faded look so I mixed some red with a tannish brown and it gave me the look I wanted. I didn't use white because I wasn't going for pink but a red that had maybe lost some of it's color. Once I had painted the overalls I decided against the stripes, simply because I liked the color I painted and the way it looked overall on the carving. The only other thing painted was the hint of a white t-shirt under the reddish shirt and the buttons.

Next I will address the base I will put him on, I am leaning towards carving a bale or two of hay for him to sit on, I may even add a pitch fork or possibly a bit of fencing. I will do one section at a time and see how it looks before I add any new additions. I will use some butternut for the bales of hay so that I can utilize the grain for additional lines for the bales.

as always happy trails
and
Carpe diem 4 carving

Monday, March 23, 2015

as previously mentioned......my flip carving

So as I had shown last August that I carved a piece of pine knot on one side and then decided I would carve something on the other side since I was just getting used to this style carving. For a while I had forgotten about this and then in the past week or so I decided I would try and come up with some way to display the carvings due to there being two, one on each side. Then while doing some much needed cleaning on my work table in the garage I came across a piece of scrap. After looking at this for a bit I thought why not try and see if this could be incorporated with the carving.

So I began to smooth out the edges and see if I could come up with a design that would look pleasing and also hold the carving. I should mention that I attached a wood dowel to the carving so I could hold it and flip it over to view both sides of the piece. I wondered, can I set up the scrap piece so it would balance with the carving. To my surprise and chagrin it actually balance nicely once the distance of how far out the carving would sit from the actual piece of scrap. In the picture shown I had begun to shape the scrap but unfortunately I had to deal with the grain just as it was presented and this would be the downfall of the scrap wood. If you look close you can see the wood around the entry point was already thin and this is the main area that the grain continually caused an issue. Eventually after a few mishaps it would break right in the thinnest portion. At least now I have a design that I can rework to eventually display the carving. I will consider placing a small piece of wood on the dowel to work as a handle and will try and work that into the design of the base. Even though in the end it failed what was cool with this was that it stood on its own. It balanced that well, even with the narrow base it stood on.

as always happy trails
and
Carpe diem 4 carving


Sunday, March 22, 2015

cottonwood bark cottage update

Yesterday I was preparing to put a finish on the cottage and thought it was a bit dull so decided I would add some extra to it to try and give it some personality. I carved some curved lines around the door and expanded them out all throughout the cottage. I also rounded the edge of the yard area to give it a more defined and natural look.

I was somewhat happy with what I had done but decided I would get out a tool rarely used any more, my detail master. I will look at utilizing this tool in the future with other carvings. I have had this since the mid 80's and it is still going strong. I decided I would try it out on cottonwood and see how well it would take detailing. The wood was easy to detail and I didn't have to set the settings very high to get the effect I was hoping for. A heads up for others looking to use a similar tool, soft to the touch is highly recommended. After burning in some more detail it seemed as if I had potentially burned the lines too dark for this wood but remembering I would be giving the cottage a sealant coating I knew it would darken the wood. As you can see it did just that. The sealant also helps to highlight features like the shingles on the roof and the bricks that make the chimney. Overall I was happy with the finished carving and have been told by family members that they would like to keep this one, who am I too argue.


as always happy trails
and
Carpe diem 4 carving

Saturday, March 21, 2015

cottonwood bark cottage

As many may know I am not the biggest fan of carving cottonwood bark. Partly because I carve in my living room with my carving apron and cottonwood can be a bit on the messy side. The other part is sometimes I am too aggressive with my cuts and with cottonwood that doesn't always work out well, nor does it work out well with other wood to be honest.

But probably at least a year ago I was given a piece of cottonwood that had already had some shaping done to be a pumpkin house. This house can be seen in Woodcarving Illustrated magazine issue #60.

Now as many may not know I am not a fan of Halloween, never have been never will be, so even though it is a cute carving I wasn't very motivated to carve a pumpkin house. But the other night I came across this magazine and got out the cottonwood bark piece and decided I would carve the house. I asked my youngest how he would like to see it carved and the vote was no on the pumpkin house. For me since I have never carved a house in cottonwood I figured I would rather do something with a bit of a change then to just carve a pumpkin face in the bark. So that is exactly what I did. I didn't read the article about carving a bark house as I didn't want to carve from the articles design.


I didn't get fancy with the carving, a round top front and side door with the front door being the larger of the two. I carved the side door indented a bit to make it look as if it was partially open. Basic shingles on the roof and a brick pattern on the chimney, hollowing out a portion of it for effect. I had considered hollowing out the chimney completely into the opening in the back but thought I better leave well enough alone for my first and possibly only one. I carved an oval window on the other side of the house and as you can see had a mishap and the window has no trim as to suggest the window pain, and yes in this instance I mean pain. I had cut the trim too narrow in the beginning and it broke so had to have a large open window. What I should have done is started with them a bit thicker and once I had gone through to the back shape them to the appropriate size and thickness. I should have considered drilling starter hole and then carving in the design.

Ironically I carved this house due to having a mishap with a piece of scrap wood I tried to utilize for my flip carving, I will post more on this next time. Always remember to be patient, work shaping then carving and everyone sooner or later has a piece destined for the kindling pile.


as always happy trails
and
Carpe diem 4 carving  
even when carving kindling


Wednesday, March 18, 2015


 Well I have carved the chest portion of my American farmer, used my wood burner to highlight and clean some areas and finally put the first sealant coating on the piece. Next is of course the painting process, I will give his bib overalls stripes as they remind me of the ones my grampa used to wear on the farm out in Nebraska. Haven't decided the color or style of the shirt yet, may be a flannel shirt but probably not as I don't want to overdo it with the stripes on both the bibs and the shirt so probably a solid color for the shirt and a white t-shirt under the collared shirt.
 
I also haven't decided yet how I will position his head, am thinking of more of a straight ahead look just barely off from center. There are of course all those wood carving rules as there are cartooning rules on presentation but I always take those as more suggestions. We should always set up our carvings as we see works best. After all unless I sale the carving it will remain in my house and more than likely on display on my roll top desk. I have many carvings on my desk, some that will never be sold. I have my ribbon winners, I have some that I just don't want to part with and some that are waiting to be painted and then the decision will be made. Bottom line whether I sell them or not I carve what pleases me and my family and the rest as they say is icing on the proverbial cake. Did I mention there are carvings in some of the desk drawers and on the little table next to the chair where I carve? What can I say I have a few carvings here and there and my family, God bless them, supports me 100%. Yeah I am blessed.
 
as always happy trails
and 
Carpe diem 4 carving 


Monday, March 9, 2015


All this may look a bit odd from the normal carvings I have posted in the past and then again those that know may not be surprised at all.

So here I have a carving of a soldier's head, a rough carving of a bust glued to a piece of scrap. As you can see the underside of the block piece of scrap has been hollowed out a bit. Also there is a wood dowel glued into the neck of the soldier, a spring from an old camera that was being scrapped, a small rubber O-ring and a small wheel from the hobby house. The spring is placed on the wood dowel followed by the O-ring and this whole assembly is placed into the opening of the body portion that was glued to the block scrap. Underneath where the block was hollowed out I attached the wheel to the wood dowel, it stays on firmly so for now I won't glue these two pieces together but may down the road. I forgot to mention that I had some old military buttons so I glued an army button on one corner of the block.

The purpose of the whole assembly is so that the head can move freely by simply turning the wheel under the block. Now I have a carving that I can change the heads position from time to time. With a little practice you can actually hold it in your hand and simply place a finger on the wheel and gently turn the head. I don't know if I plan on doing a lot of these but I did enjoy putting this together. Some may say this takes away from the carving but after all it is a caricature carving so it is not in the same category as Michael Angelo's "David"

as always happy trails
and
Carpe diem 4 the fun of carving