Monday, July 22, 2013

civil war soldier carving a.k.a. lemonade

Ever heard the phrase “When life gives you lemons, make lemonade”? How many people get this phrase any more considering most lemonade is made from a powder nowadays. This is a topic for another day, to the phrase; my civil war soldier would become case in point. Let’s go back a day or so…….

I had decided after finishing my pilot carving and being fairly happy with the results that I would carve a civil war soldier. For my pattern I would use the one supplied in issue #33 of the Carving magazine written by my good friend Mark Akers. On a side note this issue as many others are available on back issue, worth checking out.

I had carved this soldier before from a 2” block of bass wood. Earlier this summer I had gotten used 12" band saw so I wanted to carve it full size as in the magazine. On another side note, if you had read about two or so posting ago you would know I went a good portion of the summer without carving. So I was still dusting off the proverbial cob webs but after my pilot carving I was getting back in the swing of things. So as I  always do I began with carving the head, more directly the face. This will determine how to carve the hat and impact the body type as well. I had carved the details of the face deciding on a basic beard, not getting to fancy with the cuts and curves of it. The two inch carving I did had squinting eyes but I wanted to do open full eyes for this one. I got the carving done the evening before and by morning and at the point of this photo I would have to say, I was feeling pretty good about the whole thing. Things can and would change in an instant……………..
to be continued

Wednesday, July 17, 2013

"Skinny Dude" carving

I recently decided to try carving a head from Lynn Doughty’s patented head rough-out. I made small modifications to it made the chin section longer in case I wanted to have a beard and I made it fit on a 3” piece of wood that I had. Once I cut it out I decided that 3 inches on the profile was ok but that 3 inches on the width of the face was too much so cut that down to 2 inches and this looked better. 

Now awhile back while carving with my buddy up in “billyburg” (Williamsburg for those out of townies) Bob, we did almost the same thing but on a different rough-out. At the time he said that I should carve the narrow piece just to see what I could do with it. Well at the time I thought about it got busy and forgot all about it. So while holding the thinner section of wood after cutting the rough-out down I remembered the challenge and thought “why not”. This would be one of those moments where there are no expectations of the piece because what else would I do with the wood any way, nothing ventured nothing gained. 

So here is the piece carved, right now the beard has a smooth cut to it but The old wood carvers law states: “Let no wood go un-carved”.Click the link to read the original story from the woodbee carver himself.

am thinking over the idea of putting in some cuts to highlight the beard. Not sure at this point, the smooth seems to match the design in a way, time will tell.

Moral of the story carve, carve, carve any piece of wood that is available. You never know what you might find hiding within the grain. 

Friday, July 12, 2013

Well it's a bust painted version


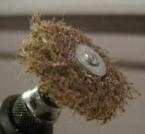
I painted the barnstormer pilot and am happy with the outcome. When I had first painted the jacket the color was too strong so to tone it down I took it to my Dremel tool with a pad that Bob gave me and what a difference, it not only helped me remove some of the paint but it also gave the finish a bit of a shimmer. With it being a leather jacket that really worked well and I will remember this for the next time. I can get the name of the pad for anyone who might want it.


The other issue I had to deal with was around the eyes. I didn't carve the eye creases that deep to create shadows so once the paint was applied it washed out my lines carved around the eyes for the most part. I had two options, to either re-carve this area then re-paint or to adjust the way I paint this area. I decided to try a new way of painting around the eyes and modified the color around the eyes to be a tad darker than the rest of the face. In the end I was happy with this call and will do this more in the future.

The other difference from previous carvings like the civil war soldier and the Santa ornaments was I painted the whiskers on the pilots face and hair as well. Normally I have gotten in the habit of leaving this unpainted, which I like because it highlights the wood and the grain. I actually wasn't happy with this after I had done it but am getting used to it now though I think in future carvings I will try to always have some un-painted wood.

Carve Diem 


Thursday, July 11, 2013

Collin Raye

I am and always will be a Collin Raye fan. When you think about songs the likes of “Love me”, “In this Life”, “Somebody Else's Moon” and “Little Rock” to name just a few, not forgetting “That's My Story” of course. As many know and some may not know, I am a softy when it comes to my faith, my family, movies and music. That’s just the way God made me and I make no apologies for that. Many of Collins songs still to this day stir the feelings I have for my wife and my boys. So what does this have to do with carving, nothing, nothing at all.

I wanted to share a new CD that came out back in 2011. Sorry, I am never up to date on anything, we just found Duck Dynasty this year. Collin has a CD out and it is wonderful and uplifting as he sings some beautiful hymns. Attached is the website for the album, take a moment and watch the video but be warned, you might need a tissue before it is done. Well worth watching and well worth the purchase for some great renditions of some traditional hymns done as only Collin can do them. I don’t usually do commercials on my blog but I had to let people know about this one, it’s awesome. With the world the way it is we could all use some inspiration right about now, kind of a refocus of the spirit.


For those who stop by for carving stuff, I will be posting the painted version of the pilot tomorrow hopefully. As my friend Mr. Mertz would say, “Would be carvers would be carvers if they would carve wood”. Well, what are you waiting for, get at it.


Tuesday, July 9, 2013

Well it's a bust

Last night I completed the lower half of the barnstormer pilot and for the most part I am happy with the results. I purchased some new tools at the end of April first of May time frame but hadn't gotten chance to use them. I purchased the tools from Drake Knives and highly recommend them. They have a nice comfortable grip that fits nice in your hand, and they are sharp ready to go to work the day they arrive. I purchased a #3 3/8 tool on recommendation of a carving buddy/mentor but wasn't sure how much time this tool would receive but after watching a clip or two of Ian Norbury carving worked it into my routine and love the way it carves.


On a side note when viewing a carving video not only pay attention to what is being carved but also the tools and how they are being used. Even carvers that carve a style different from your own can teach you something new if you are open to learning. Many of us can’t buy every tool that the established carvers have so we must be selective in the ones we do buy.

The bottom half of the barnstormer is a basic jacket collar with wrinkles in between for a scarf. I am anxious to get to painting him to see how he comes out. I carved the base with a double lip, kind of a bi-plane angle to the overall carving. Sometimes what we carve into the design is obvious to us but may not stand out to anyone else, but that’s o.k., it’s your carving.