Tuesday, September 23, 2014

New blog by veteran writer


Now there is a new blog from a veteran writer. She has had a blog for years but it is now under a new name but still the same great writing and tips for wood carvers everywhere.  Susan Alexander Carves is out there and ready for new and old viewers who love tips from veteran carvers.
 
You will find more information on these pages than you will be able to use, she is a great carver and ambassador for carving and simply lives to learn and share what she has leaned with you. Please take the time to stop by her blog and see what she has to offer there.


as always happy trails
and
Carpe diem 4 carving

Tuesday, September 16, 2014

4th of 4 finally painted and then some


Well last night I painted the last of the four and it came out pretty nice, if I don't say so myself and as Red Skelton would say "if I do it I get a whippin..........I do it" so yes it came out pretty nice. I did this one with less detail on the carving side and let the paint do some of the highlighting. You may have noticed that I didn't carve detail in the eye brows but simply applied a layer or two of paint. Didn't paint in much detail in the tassel either just a coating of white and fini.


I also reworked or modified a carving that had already been painted and thought it was done. My neighbor is a tech fan and is having some health issues so I modified the ornament for him. Since I am a Nebraskan this will not become a habit of defacing my carvings with other teams :) but hopefully it will bring him a smile during this time.


as always happy trails
and
Carpe diem 4 carving
(and painting)


Sunday, September 14, 2014

3 out of 4


 Well last night I got some ornaments painted again but Nebraska was on TV so I only got three of the four done, hey it's a Cornhusker thing.
GO BIG RED


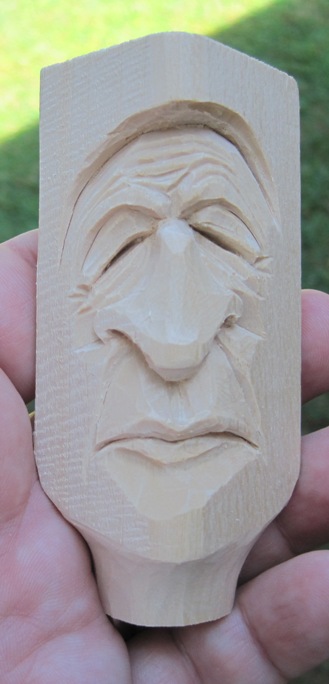
Ok back to the painting portion of the evening, I did three of the four and I used some of the techniques that Randy True suggested. I have a different protective finish that I use that I got out of one of the wood carving magazines a few years ago so for these carvings I used it but will go out and buy the recommended finish to compared how they stand up to each other.


So for these here is what I did;
  1. I lightly sanded down each carving utilizing my Dremel
  2. I dipped the carvings in Minwax watered based Polycrylic protective finish
  3. I lightly wiped them down to try and put an even and light covering
  4. Once dried completely I applied paint to each carving still layering colors like I always have
  5. This morning I dipped the carvings for another coating of the Minwax finish

And that is where we are now with paint and protective finish applied, no fuzzies. I did have a few places where I had to go back over with color during the painting process as the wood didn't seem to take in the paint evenly. I believe this was related to areas I may not have gotten the protective finish evenly distributed but in the end I don't see that it had any impact on the final piece.

You may notice I had fun with one of the carvings and added a graphic to the tassel of his cap, I think you get the general idea of the image, just for fun.

as always happy trails
and
Carpe diem 4 carving

Saturday, September 13, 2014

4 new ornaments


Well I have 4 new carvings completed in reference to carving. Now I will work on the painting process sometime this weekend, possibly, you know how weekends can get.
 
All carvings are hollowed out in the back but thought one image was enough to give you the general idea on this.

So about the whole painting thing, I have in the past had an issue with the "fuzzies" arising during the painting process, so as I often do I ask some of the veteran carvers I have come to know to get a feel from them on the possible change in procedure in the way that I paint my carvings. On this topic I made my inquiry with Randy True and yes folks he is truly a talented carver. You can click his name and it will take you to his Etsy shop. As Randy always does he graciously sent me his procedures on how to prepare and finish a painted carving. I thought this was wonderful information and wanted to share this here; 

This is what I do to finish a piece:

1. Lightly sand to help smooth piece out.
2. Wood burn all stop cuts. By lightly burning the stop cuts, it will eliminate the fuzzies, plus helps with smooth lines. You don't want the wood burner hot enough to leave dark lines - just hot enough to where it will remove the fuzzies. I usually set my wood burner in between 2 and 3. Test it on a scrap piece of wood first.
3. I spray each piece with Krylon Clear Satin Sealer (you can get this at Walmart, etc. with the spray paints). This will help seal the piece so the watered down paint does not soak into the wood. If there is too much water applied to the wood, you will get fuzzies.
4. Paint the piece.
5. I apply an oil-based antique wash to the piece. This is my preference, some carvers do this, some don't. If you do this step, spray another coat of sealer before you antique it.
6. When the piece is finished you can apply another coat of sealer over the antiquing - this helps to seal the finished piece. If you decide not to antique the piece, just apply one coat of sealer after you finish painting.

When you apply the sealer, try to give it light coats. If you apply too much, when the sealer dries the paint will have a chalky appearance. If this happens, just take a paper sack and wipe the piece down.


So I will be trying this for my next carvings and will give you and Randy an update on how it works out. I like all carvers am in a constant state of learning and growing as a carver, so always remember the only stupid question is the one you won't ask. Wood carvers I have found are the most willing to share and help a new and veteran carver whenever possible. Trust me I have asked some of the greats of wood carving.


as always happy trails
and
Carpe diem 4 carving
(or painting a carving) 

Thursday, September 11, 2014

protective coating applied to carvings

Well this afternoon I had a chance to apply the protective coating to some carvings and to my fingers. They will hang in the garage to finish drying and get an additional coating if needed. I try not to put the finish to heavy as it will give the carvings a plastic look, where as a consistent coat will protect the carving and highlight the colors and the wood grain. There are some old school ways to apply a finish to the carvings and a few new ways. I use a newer version as it eliminates the buildup of dust on the carving cause even though a lot of my carvings are ornaments I always take the attitude that it could be displayed all year and only on the tree at Christmas time. Many of the newer methods don't have combustible rags that need to be stored in my garage while waiting to be discarded. I like the end results and have no complaints from anyone who has ever purchased a carving from me.

as always happy trails
and
Carpe diem 4 carving 

Monday, September 8, 2014

more on the Christmas front


Here is the latest carving, I just like this guy for some reason. He is carved from a 1 1/2 corner cut and is just over 4" long and almost 2" wide. I had gotten away from the smaller carvings but I really like these guys and I think they are a great size to hang on the tree. Don't get me wrong the larger ones hang on a tree wonderfully, it just comes down to what size you prefer.


This guy has had a busy couple months and is trying his best to stay awake but his best efforts seem to be falling a little short. He has a content look on his face so he obviously completed the task at hand, whether it be making toys or taking a midnight ride around the globe with eight reindeer. I leave the story line to whoever takes one of these guys home.
 
as always happy trails
and
Carpe diem 4 carving

Sunday, September 7, 2014

paint, paint and more paint

 
Well for the last few posts I have shown some of the new carvings I am working on. I looked at these and realized they were beginning to build up into a good number so I spent most of my day painting. It would probably have gone faster if it had been a week day and/or college football wasn’t on. I have pondered for a while how it would go if I painted multiple carvings in one sitting opposed to one at a time as I have in the past, remember I do this as a hobby, I have a day job. 

I actually thought this worked out well and will do this again in the not so distant future. I continue to see the benefits of my having worked with water colors, as I have with my cartoons. This seems to have benefitted my painting technique in regard to my carvings. My concern though is that everything ends up looking the same but since most of my carvings this time of year have a similar theme, not sure this will be much of an issue at this time. One or two of the carvings after being painted revealed to me some problems with how they were either carved or the design of the carving. For the most part when I looked at them with fresh eyes this morning I was happy overall. Of course there will always be things to improve upon, after all this is a journey not a one day excursion.


as always happy trails
and
Carpe diem 4 carving

Saturday, September 6, 2014

blockhead whittle doodle Santa style


As the headline says, here are my latest blockhead whittle doodles Santa style. I am trying my best to balance the idea of carving in detail but not too much. The concept is you carve some details of a face but not the complete face leaving some of the block of wood showing. With each carving I varied the amount of detail in each of them which becomes a balancing act with certain features such as beards and Christmas caps, after all I have to carve enough to let your mind see Santa.
 
So my latest carvings, two Santa blockheads, after all it must be the season since they already have decorations up at the stores just as Charlie Brown and Linus predicted. Both carvings  are unfinished but will end up with a bit of color but not completely. I will experiment with this as well on how much color is enough and how much is too much, hopefully I won’t get there. One of the Santa carvings you may notice I cut all the way through in areas, on one I did this with the eyes trying to work the shadows and light into the carving. This becomes tricky when hollowing out the back to make sure you remove enough to open up an area but not opening up so much that it takes away from the carving. On both carvings I have hollowed out the back as they will both be set up to be hang able for those who might have a tree in the house that needs decorating.   


Thursday, September 4, 2014

block head whittle doodles

Well the other day I cut some wood for carving and I made a batch of corner cuts that I will carve some blockhead whittle doodles. A corner cut is when I take a block of wood and cut it in an angle from one corner to the other, this gives me a triangle and this is what I use to carve my ornaments and my blockhead whittle doodles.

The first one is simply an elderly gentleman and he seems to have or is in the process of falling asleep. Maybe he is trying to read the paper and is to tired to look for his glasses so he is "playing trombone" as he struggles to get the paper at the proper distance where he can get things on the page to focus in, like words for instance.  He doesn't look to be too worked up over his situation but by the wrinkles on his forehead there is something perplexing him in the afternoon paper, yeah this guy looks to be the type that might enjoy the simply pleasure of a newspaper, nothing to charge up, no screen to wipe off. All he has to do is turn the page.

I am toying with the idea of selling some of these in my Etsy shop, the question is do I clean them up or do I leave them exactly as they are a simple carving rough edges still showing? I haven't decided that yet. This would be as if I just finished the main carving of the piece and handed it over to someone to give then a better look at it. I will make this decision at a later date, not today.

as always happy trails
and
carpe diem 4 carving